You may recall that I wrote a Ruby program about nine months ago to programmatically generate a color palette. In that version, I manually measured the colors from an image on screen, and typed them into a text file, and the program generated color squares from the text file.
When I finished I wanted to automatically generate a color palette from the image, but I didn’t have any more time to experiment, and my chops weren’t really good enough to know how to approach it.
About a month ago, I happened to be cruising Shelly Powers‘ site, and she had this great idea to use the rule of thirds to automatically get color values in images. She’s using it to dynamically generate CSS color stripes and circles on the fly, which is cool in-and-of itself, but her code gave me the clue on how to take another run at this. (Thank you!) And, in the last nine months, my chops got better, having written all the CSS and a lot of Rails view code for Gift Ecology.
I now have a new program, palettegen.rb, taking photos in and putting palette images out, more or less how I want it to work. You can see the code here. Now, don’t laugh – my chops have improved but they’re not pwning you yet!
If you have a Unix machine with a decent Ruby, RMagick, and ImageMagick installation, you type:
ruby palettegen.rb InputImage OutputImage SwatchSize AperatureSize
IOW, you point it to an image, and tell it what to call the output image. You set a size for the color swatches it will generate. And you tell it what aperture to use when selecting pixels. The aperture is on the end of the line because you might want to experiment.
The program finds the center of the image, and also divides the image into thirds, horizontally and vertically, then finds the intersection points of those four lines. At each of the five points (intersections plus the center), it selects a small “window” of pixels based on the aperture setting, and then quantizes those pixels down to a single color. This aperture size turns out to be important – you can imagine the color variation between, say, 5 pixel and 500 pixel apertures. Then it makes eight color variations for each of the five sampled colors.
Examples
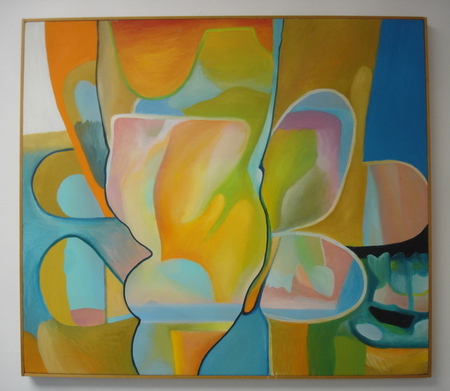
Vienna Candy Shoppe Window
Here’s the original photo:

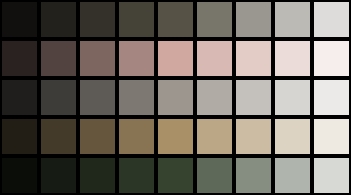
And a palette (swatch=35, aperture=10)

The first thing that jumps out at me is, Wow, that’s a beautiful palette. The next thought is, They’re not the colors I would have guessed from looking at the photo. But beautiful nonetheless.
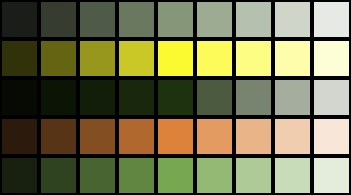
Here’s how to read the palette image:
- Each row represents a palette based on one of the five points sampled in the image.
- The actual color selected from the image is the center swatch of each row (#5).
- To the right in each row we’re adding white. 20%, 40%, 60%, 80%.
- To the left in each row we’re adding black, 20%, 40%, 60%, 80%.
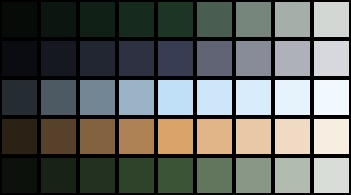
Let’s look at the same image, with aperture=100
Another really interesting set of colors. What about a very small aperture, like 2?
You get the idea. Here are two more examples.
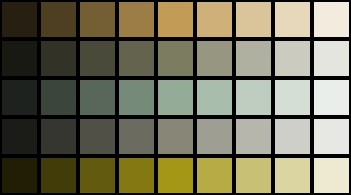
Flowers
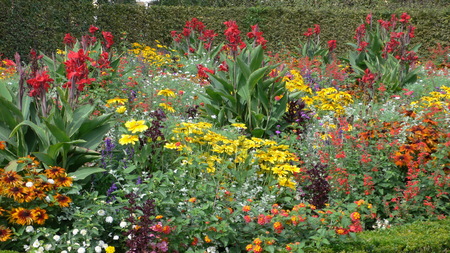
Palettes, aperture 200, then 7
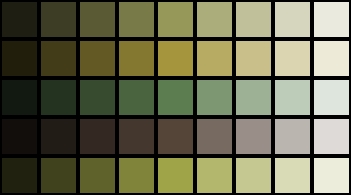
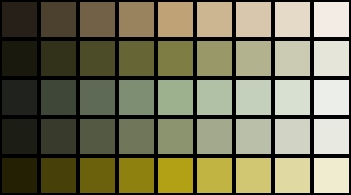
Acrylic painting by John Joline
Palette, aperture 100, then 50 (very subtle differences)
It’s a simple and crude program, but it’s generating pleasing results. It took about 18 hours to write. The Ruby was relatively strightforward, though I haven’t made it very elegant yet. What was hard was figuring out how ImageMagick wanted me to do things. I had a good idea of what I wanted to do, but it took time to try to figure out how, for example, to “average the swatch and blend colors.” It turned out to be a “crop” and a “quantize” – that was a few hours right there, finding those two words, and how to use them. I also spent several hours learning how to do the actual image math. I pursued one strategy, simply multiplying the rgb values, for a long time. Which not only didn’t work, but was completely the wrong idea to begin with. I needed to learn how to do a “blend,” which I finally arrived at via a detour through “composit.” And if you’re blending, and want to “extrapolate” (using values greater than one) don’t forget to note the teeny tiny text that says, “Extrapolation ability was added to the “-blend” operator in IM v6.3.5-10.” If your install is less than that (6.3.4 in my case), don’t bother with the extrapolation research.